Create a blog application with django, part 8: create django sitemap
Django comes with a sitemap framework, which allows you to generate sitemaps for your site dynamically. A sitemap is an XML file that tells search engines the pages of your website, their relevance, and how frequently they are updated. A valid sitemap increases your website's search engine ranking.
For example, the sitemap for this blog can be found at https://www.osehfrank.com/sitemap.xml
The Django sitemap framework depends on django.contrib.sites, which allows you to associate objects to particular websites that are running with your project. This comes handy when you want to run multiple sites using a single Django project. To install the sitemap framework, you will need to activate both the sites and the sitemap applications in our project. Edit the settings.py file of your project and add django.contrib.sites and django.contrib.sitemaps to the INSTALLED_APPS setting. Also, define a new setting for the site ID, as follows:
# mysite/settings.py

 SITE_ID = 1

 # Application definition

 INSTALLED_APPS = [
   # ...
   'django.contrib.sites',
   'django.contrib.sitemaps',
 ]
Now, run the following command to create the tables of the Django site application in the database:
$ python manage.py migrate
You should see an output that contains the following lines:
Applying sites.0001_initial... OK
Applying sites.0002_alter_domain_unique... OK
The sites application is now synced with the database. Now, create a new file inside your blog application directory and name it sitemaps.py. Open the file and add the following code to it:
from django.contrib.sitemaps import Sitemap
from .models import Post


class PostSitemap(Sitemap):
   changefreq = 'weekly'
   priority = 0.9

   def items(self):
       return Post.published.all()

   def lastmod(self, obj):
       return obj.updated
We create a custom sitemap by inheriting the Sitemap class of the sitemaps module. The changefreq and priority attributes indicate the change frequency of your post pages and their relevance in your website (the maximum value is 1). The items() method returns the QuerySet of objects to include in this sitemap. By default, Django calls the get_absolute_url() method on each object to retrieve its URL. Remember that we created this method in create a blog application with django, part 5: write django views, to retrieve the canonical URL for posts. If you want to specify the URL for each object, you can add a location method to your sitemap class. The lastmod method receives each object returned by items() and returns the last time the object was modified. Both changefreq and priority methods can also be either methods or attributes. You can take a look at the complete sitemap reference here .
Finally, you will just need to add your sitemap URL. Edit the main urls.py file of your project and add the sitemap, as follows:
# mysite/urls.py

# ...
from django.contrib.sitemaps.views import sitemap
from blog.sitemaps import PostSitemap

sitemaps = {
   'posts': PostSitemap,
}

urlpatterns = [
   path('blog/', include('blog.urls', namespace='blog')),
   path('admin/', admin.site.urls),
   path('sitemap.xml', sitemap, {'sitemaps': sitemaps},
       name='django.contrib.sitemaps.views.sitemap') # New
]
In the preceding code, we included the required imports and defined a dictionary of sitemaps. We defined a URL pattern that matches with sitemap.xml and uses the sitemap view. The sitemaps dictionary is passed to the sitemap view. Now, run the development server and open http://127.0.0.1:8000/sitemap.xml in your browser. You will note the following XML output:
This XML file does not appear to have any style information associated with it. The document tree is shown below.

<urlset xmlns="http://www.sitemaps.org/schemas/sitemap/0.9">
<url>
<loc>
http://example.com/blog/2020/1/11/python-my-favourite-programming-language/
</loc>
<lastmod>2020-01-11</lastmod>
<changefreq>weekly</changefreq>
<priority>0.9</priority>
</url>
<url>
<loc>
http://example.com/blog/2020/1/11/django-best-python-web-framework/
</loc>
<lastmod>2020-01-11</lastmod>
<changefreq>weekly</changefreq>
<priority>0.9</priority>
</url>
<url>
<loc>
http://example.com/blog/2020/1/6/the-gods-of-our-ancestors/
</loc>
<lastmod>2020-01-11</lastmod>
<changefreq>weekly</changefreq>
<priority>0.9</priority>
</url>
</urlset>
The URL for each post has been built calling its get_absolute_url() method. The lastmod attribute corresponds to the post updated date field, as we specified in our sitemap, and the changefreq and priority attributes are also taken from our PostSitemap class. You can see that the domain used to build the URLs is example.com. This domain comes from a Site object stored in the database. This default object has been created when we synced the site's framework with our database.
Log in to the Django admin site with your browser, visit http://127.0.0.1:8000/admin/sites/site/. You should see something like this:
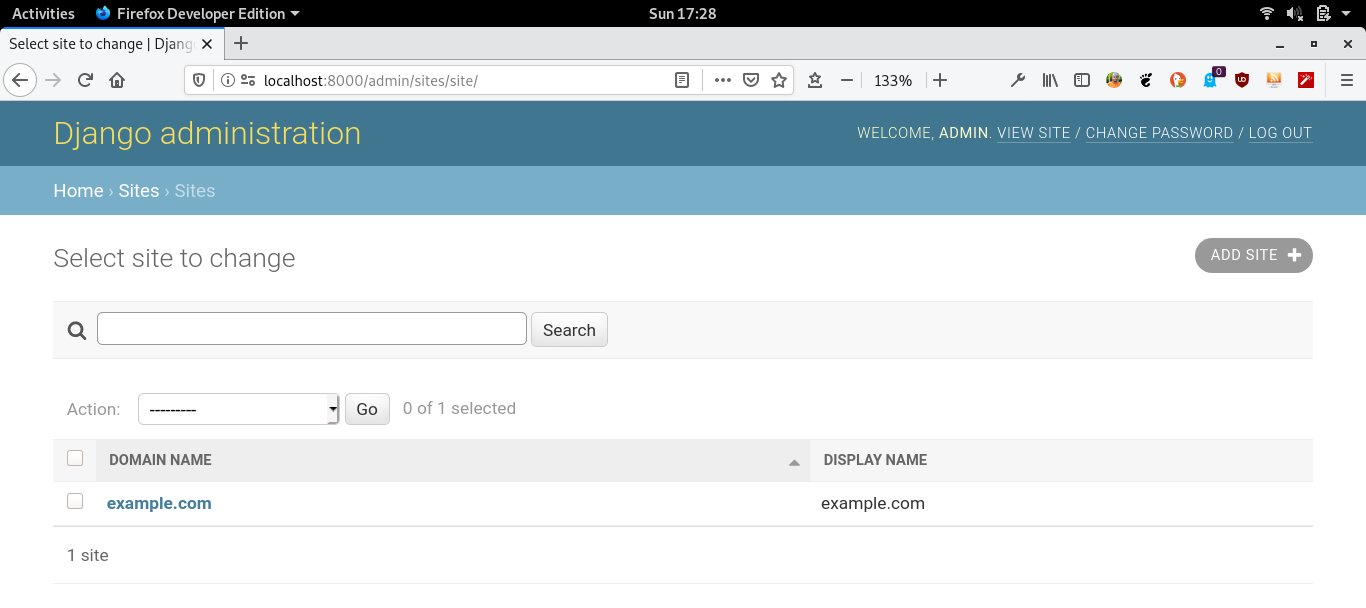
The preceding screenshot contains the list display admin view for the site's framework. Here, you can set the domain or host to be used by the site's framework and the applications that depend on it. In order to generate URLs that exist in our local environment, change the domain name to localhost:8000, as shown in the following screenshot, and save it:
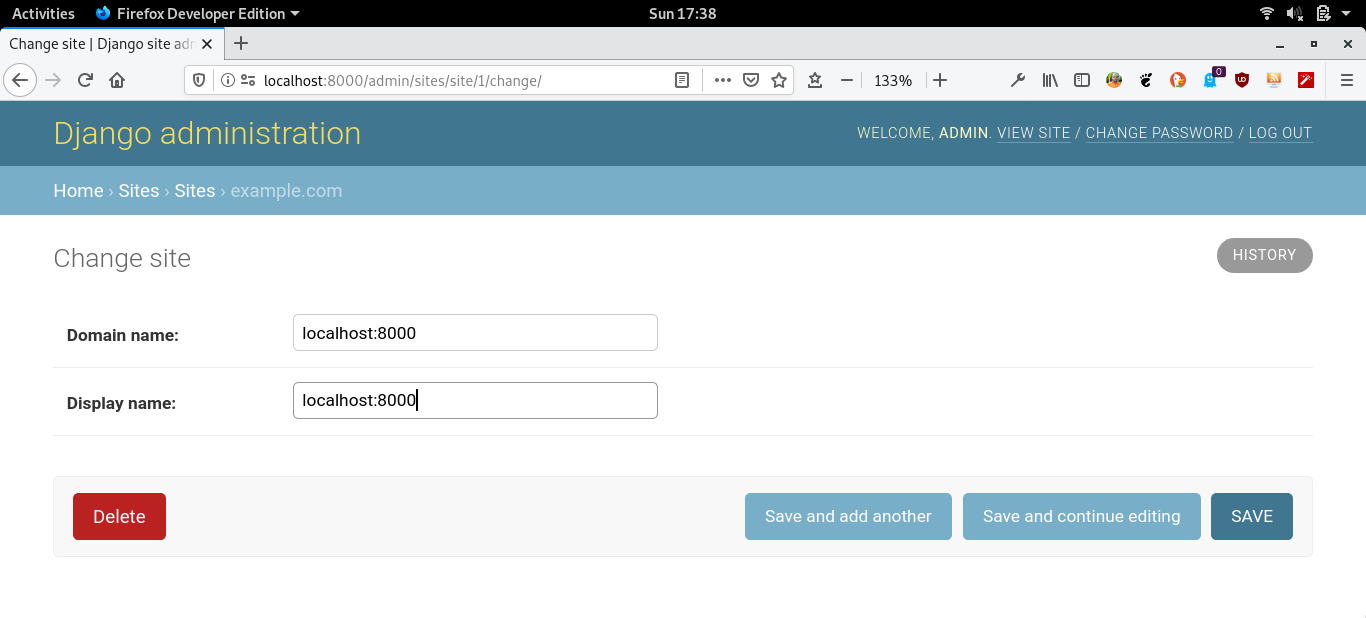
Note: The URLs displayed in your feed will now be built using this hostname. In a production environment, you will have to use your own domain name for the site's framework.
That's it for now. I hope to continue to add useful features to this blog application tutorial.
If you like my content, please consider buying me a coffee.
Thank you for your support!
Related posts
- Master the Art of Handling Dates and Times in Django with Python’s datetime Module
- create a blog application with django, part 11: create django custom template tags and filters
- create a blog application with django, part 10: configure django to use postgreSQL
- create a blog application with django, part 9: create django rss feeds
- create a blog application with django, part 7: add pagination in django blog
- create a blog application with django, part 6: create django templates
- create a blog application with django, part 5: write django views
- create a blog application with django, part 4: django querysets and managers
- create a blog application with django, part 3: create django admin site
- Create a blog application with django, part 2: create django models
- create a blog application with django, part 1: install django with pip