Create a blog application with django, part 11: create django custom template tags and filters
Django provides the following helper functions that allow you to create your own template tags in an easy way:
- simple_tag: Processes the data and returns a string
- inclusion_tag: Processes the data and returns a rendered template
To follow up with this tutorial, please read this blog post.
Let's get started
The most common place to specify custom template tags are inside Django applications.
Create the following directory and files inside your blog application directory:
(venv) mypc:~/venv/mysite/blog$ mkdir templatetags

$ cd templatetags

$ touch __init__.py blog_tags.py
The file structure of the blog application should look like the following:
# mysite/blog

blog/
   __init__.py
   models.py
   ...
   templatetags/
       __init__.py
       blog_tags.py
Note: The way you name the file is important. You will use the name of this module to load tags in templates. For convenience, is better to name the file after your app name, like myapp_tags.py.
We will start by creating a simple tag to retrieve the total posts published in the blog. Edit the blog_tags.py file and add the following code:
# mysite/blog/templatetags/blog_tags.py

       from django import template

       from ..models import Post

       register = template.Library()

       @register.simple_tag
       def total_posts():
   return Post.published.count()
We have created a simple template tag that returns the number of posts published. Each template tags module needs to contain a variable called register to be a valid tag library. This variable is an instance of template.Library, and it's used to register our own template tags and filters. Then, we define a tag called total_posts with a Python function and use the @register.simple_tag decorator to register the function as a simple tag. Django will use the function's name as the tag name. If you want to register it using a different name, you can do it by specifying a name attribute, such as @register.simple_tag(name='custom_name').
Before using custom template tags, you have to make them available for the template using the {% load %} tag.
Open the blog/templates/base.html template and add {% load blog_tags %} at the top of it to load your template tags module. Then, use the tag you created to display your total posts. Just add {% total_posts %} to your template. The template should finally look like this:
<!-- mysite/blog/templates/base.html -->

{% load blog_tags %}
{% load static %}

       <!DOCTYPE html>
       <html>
       <head>
               <title>{% block title %}{% endblock %}</title>
               <link href="{% static "css/blog.css" %}" rel="stylesheet">
       </head>
       <body>
               <div id="content">
                 {% block content %}
                 {% endblock %}
               </div>
               <div id="sidebar">
                 <h2>My blog</h2>
                   <p>This is my blog.</p>
                   <p>The latest {% total_posts %} posts published so far in my blog.</p>

                   <p><a href="{% url "blog:post_feed" %}" title="Subscribe to my RSS feed">RSS feed</a></p>

               </div>
       </body>
       </html>
We will need to restart the server to keep track of the new files added to the project. Stop the development server and run it again using the following command:
python manage.py runserver
Open http://localhost:8000/blog/ in your browser. You should see the number of total posts in the sidebar of the site, as follows:
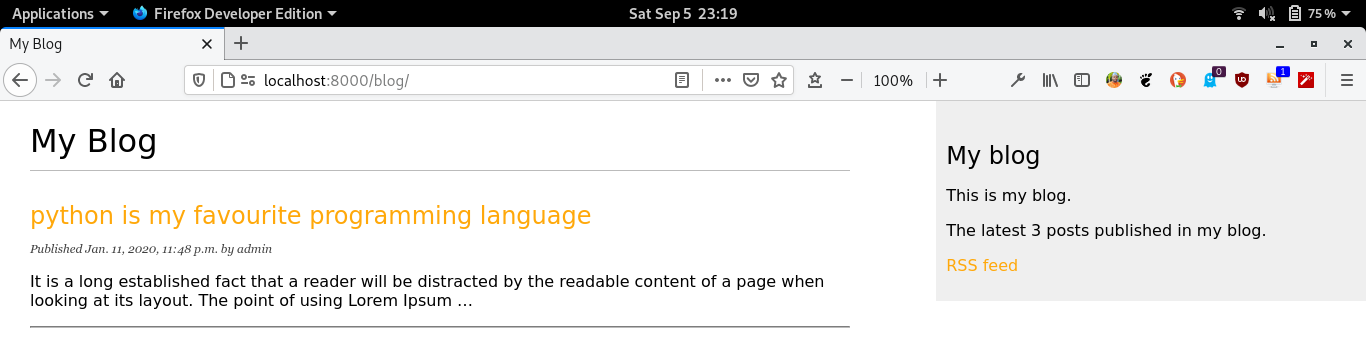
The power of custom template tags is that you can process any data and add it to any template regardless of the view executed. You can perform QuerySets or process any data to display results in your templates.
Now, we will create another tag to display the latest posts in the sidebar of our blog. This time, we will use an inclusion tag. Using an inclusion tag, you can render a template with context variables returned by your template tag. Edit the blog_tags.py file and add the following code:
# mysite/blog/templatetags/custom_blog_tags.py

@register.inclusion_tag('blog/latest_posts.html')
def render_latest_posts(count=5):
   latest_posts = Post.published.order_by('-publish')[:count]
   return {'latest_posts': latest_posts}
In the preceding code, we register the template tag using @register.inclusion_tag and specify the template that has to be rendered with the returned values using blog/latest_posts.html. Our template tag will accept an optional count parameter that defaults to 5. This parameter allows us to specify the number of posts we want to display. We use this variable to limit the results of the query Post.published.order_by('-publish')[:count]. Note that the function returns a dictionary of variables instead of a simple value. Inclusion tags have to return a dictionary of values, which is used as the context to render the specified template. The template tag we just created allows you to specify the optional number of posts to display as {% render_latest_posts 2 %}.
Now, create a new template file under blog/templates/blog/ and name it latest_posts.html. Add the following code to it:
<!-- mysite/blog/templates/blog/latest_posts.html -->

        <ul>
       {% for post in latest_posts %}
               <li>
                 <a href="{{ post.get_absolute_url }}">{{ post.title }}</a>
               </li>
       {% endfor %}
       </ul>
In the preceding code, we display an unordered list of posts using the latest_posts variable returned by our template tag. Now, edit the blog/templates/base.html template and add the new template tag to display the last two posts. The sidebar code should look like the following:
<!-- mysite/blog/templates/base.html -->

<div id="sidebar">
   <h2>My blog</h2>
     <p>This is my blog.</p>
     <p>The latest {% total_posts %} posts published so far in my blog.</p>

     <h3>Latest posts</h3>
     {% render_latest_posts 2 %}

     <p><a href="{% url "blog:post_feed" %}" title="Subscribe to my RSS feed">RSS feed</a></p>

 </div>
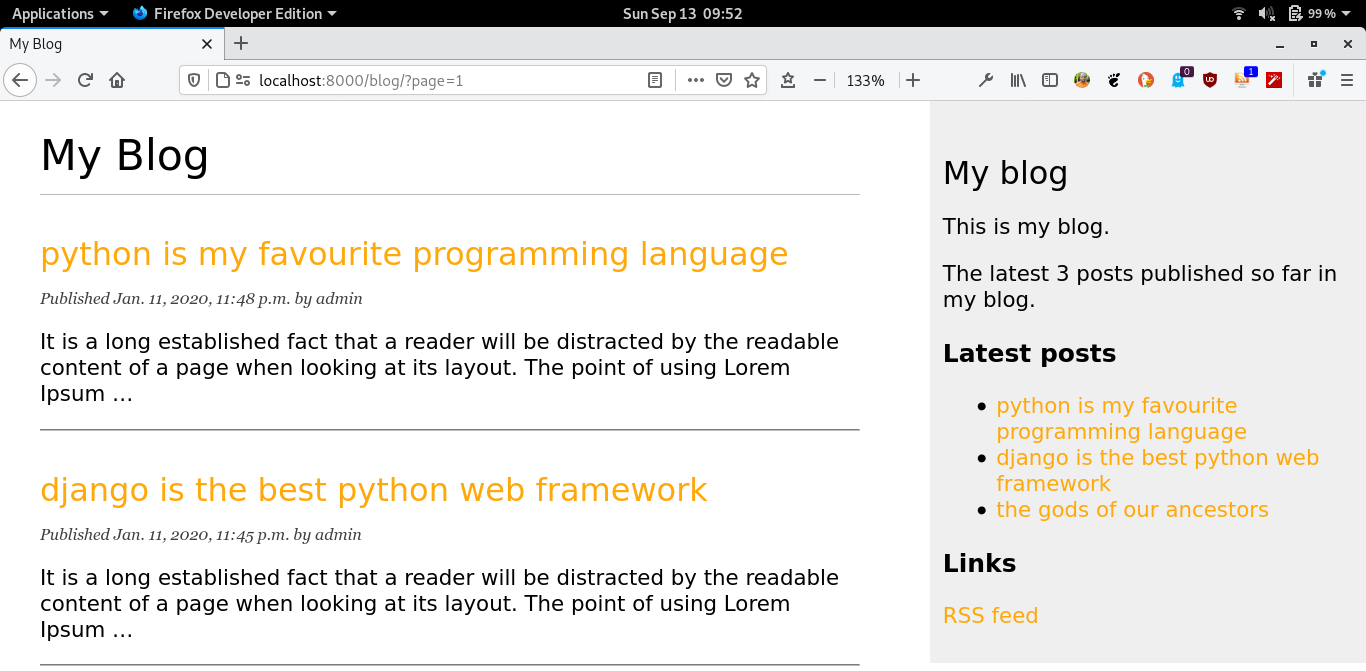
The template tag is called, passing the number of posts to display, and the template is rendered in place with the given context.
Open http://localhost:8000/blog/ in your browser. The sidebar should now look like this:
You can read more about how to build django custom template tags here.
Creating custom template filters
Django has a variety of built-in template filters that allow you to modify variables in templates. These are Python functions that take one or two parameters—the value of the variable it's being applied to, and an optional argument. They return a value that can be displayed or treated by another filter. A filter looks like {{ variable|my_filter }}. Filters with an argument look like {{ variable|my_filter:"foo" }}. You can apply as many filters as you like to a variable, for example, {{ variable|filter1|filter2 }}, and each of them will be applied to the output generated by the preceding filter.
Calculating content read time in Django Python
We will create a custom filter to calculate the read time of our blog post content.
First, install the Python readtime module via pip using the following command:
$ pip install readtime==1.1.1
Then, edit the blog_tags.py file and add the following code:
# mysite/blog/templatetags/blog_tags.py

import readtime

@register.filter(name='read_time')
def read_time(html):
    return readtime.of_html(html)
We register template filters in the same way as template tags.
So far so good, the blog_tags.py file should now look like this:
 # mysite/blog/templatetags/blog_tags.py

import readtime

from django import template

from ..models import Post

register = template.Library()


@register.simple_tag
def total_posts():
   return Post.published.count()


@register.inclusion_tag('blog/latest_posts.html')
def render_latest_posts(count=5):
   latest_posts = Post.published.order_by('-publish')[:count]
   return {'latest_posts': latest_posts}

@register.filter(name='read_time')
def read_time(html):
   return readtime.of_html(html)
Open the blog/templates/blog/post_detail.html template and add {% load blog_tags %} after {% extends "base.html" %} to load your template tags module. Then, use the filter you created to calculate the read time of your blog post content. Just add {{ post.body|read_time }} to your template. The template should finally look like this:
<!-- mysite/blog/templates/blog/post_detail.html -->

{% extends "base.html" %}
{% load blog_tags %}

{% block title %}{{ post.title }}{% endblock %}

{% block content %}
 <h1>{{ post.title }}</h1>
 <p class="date">
   Published {{ post.publish }} by {{ post.author }} | {{ post.body|read_time }}
 </p>
 {{ post.body|linebreaks }}
{% endblock %}
If the development server is not running start it with the following command:
$ python manage.py runserver
Visit http://127.0.0.1:8000/blog/ with your Web browser and click on one of the post titles to take a look at the detail view of a post. You should see something like this:

You can find more information about Python readtime here .
that's it for now, stay connected for more useful features.
If you like my content, please consider buying me a coffee.
Thank you for your support!
Related posts
- Master the Art of Handling Dates and Times in Django with Python’s datetime Module
- create a blog application with django, part 10: configure django to use postgreSQL
- create a blog application with django, part 9: create django rss feeds
- create a blog application with django, part 8: create django sitemap
- create a blog application with django, part 7: add pagination in django blog
- create a blog application with django, part 6: create django templates
- create a blog application with django, part 5: write django views
- create a blog application with django, part 4: django querysets and managers
- create a blog application with django, part 3: create django admin site
- Create a blog application with django, part 2: create django models
- create a blog application with django, part 1: install django with pip